I hope you’ll all indulge me - I’ve been thinking a bit about this today after watching the Qualifier this morning and chatting to players throughout, so I thought while this may seem pretty basic, it feels worthwhile getting down just in case it is helpful to anyone as we get to the pointy end of Pre-Alpha. Some discussion went around about strategy and effectiveness of agents at different points in the game, and the part I honed in on was around surviving to the final handful of agents / rounds in a match, how it can be managed, and how you can get far enough along collecting shards while staying out of combat as you build up your power level.
I wanted to share my thoughts around the first couple of rounds that may help get you kick-started in a survivor/collector strategy, specifically how your Drop Phase choice can set you up really well!
Note: This is just my opinion, and may only suit my play style - definitely keen to hear counterpoints, criticism or anything else.
Taking a sample drop screen:

If you want to go collecting, but also want to stay relatively safe for at least a few rounds to get some attack or defence built up, where do you start?
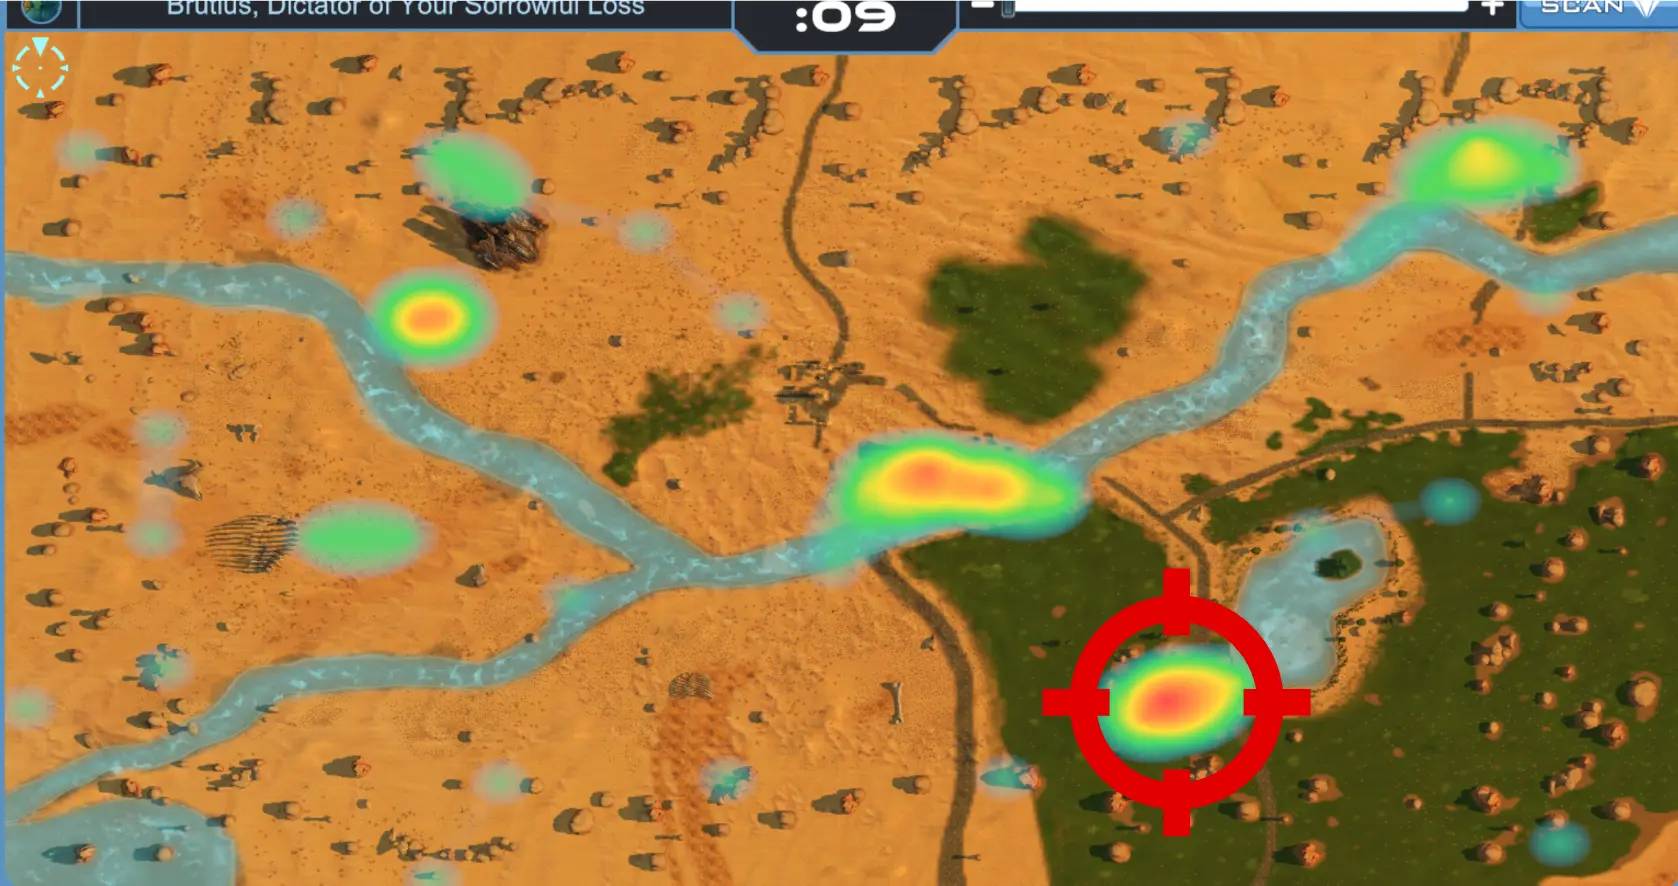
This is obviously a high density shard cluster. There are lots of shards to grab in a very small area, which may seem like a good plan to get collecting underway. HOWEVER: there are a few problems with starting here. Other collectors will likely think the same, so you will not only be competing for the shards, you will be taking damage constantly. This is EXACTLY the kind of spot I would drop as an Attacker looking at a Brawlmaster strategy. This is a danger zone. You can only collect as fast as your shard cooldown - early on that is slow, so it wouldn’t matter if there is a million shards there, you can’t get them faster than your cooldown.
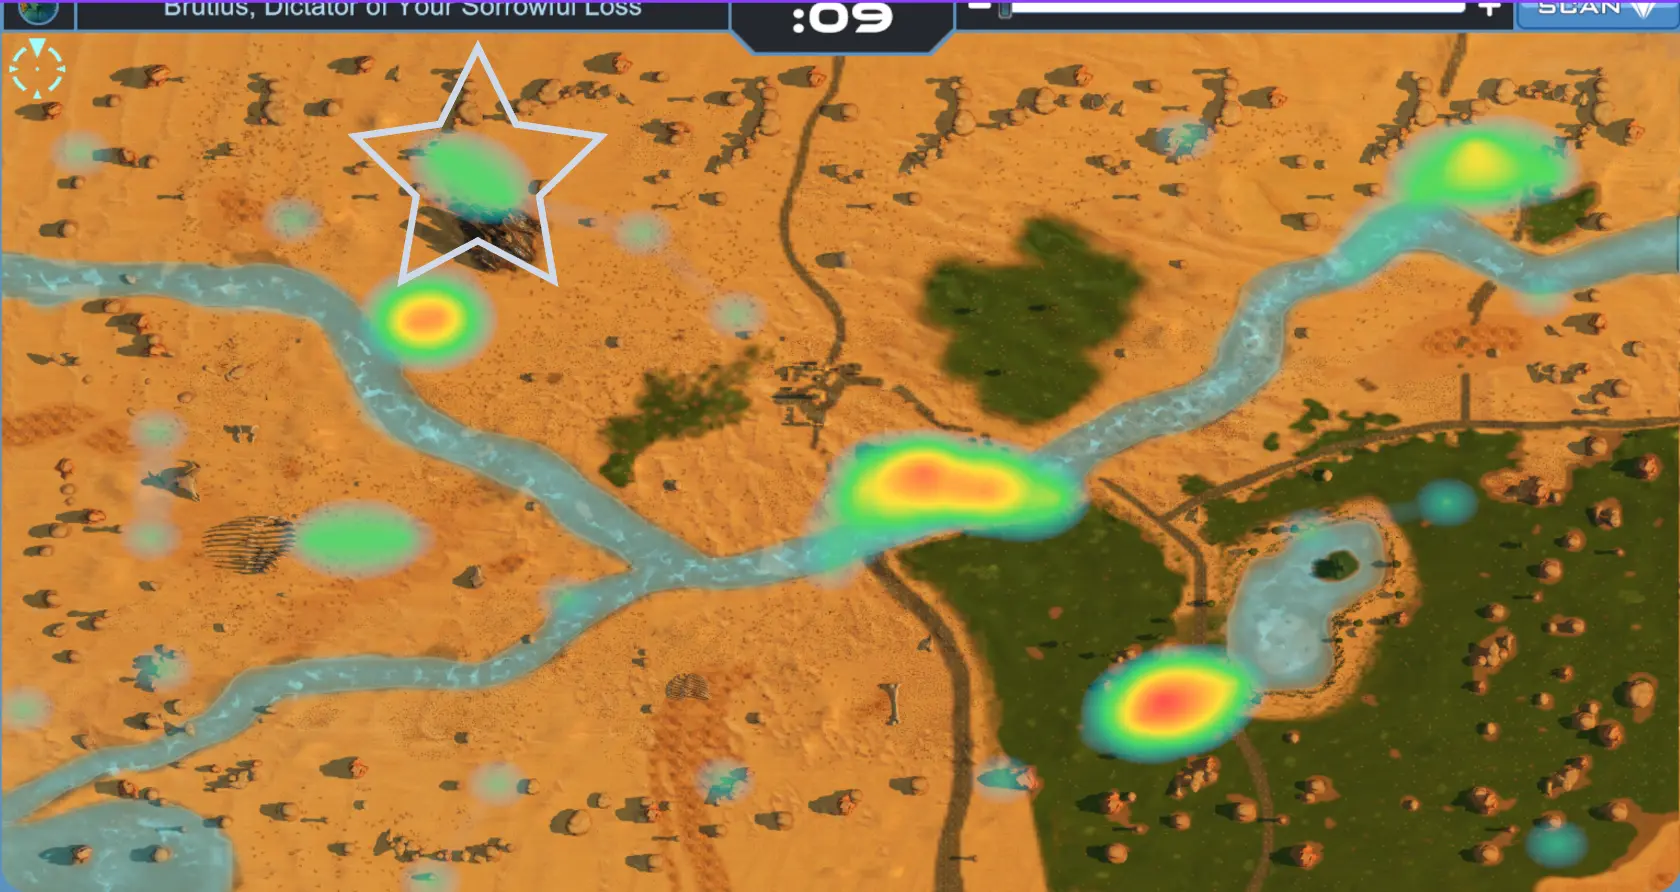
To try and avoid some of the high density problems, you might look to go to a medium density shard cluster, hoping that you are alone. Unfortunately, that is a crap shoot — many collectors may think the same as you, and so you are rolling the dice on if you end up alone or not, which could either have you taking damage early on, or have you missing out on shards through competition or going on survive to move away from others. Led by the thought that you can only collect as fast as your cooldown, what I tend to do is this (not ALWAYS, just to keep those dastardly Attackers guessing):

This is a group of 4 single shards. That is MORE than enough to keep me busy in the first 2-3 rounds, even if I somehow get shard cooldown reduction on turn 1. This is usually very quiet, out of the way, no competition and no attackers.
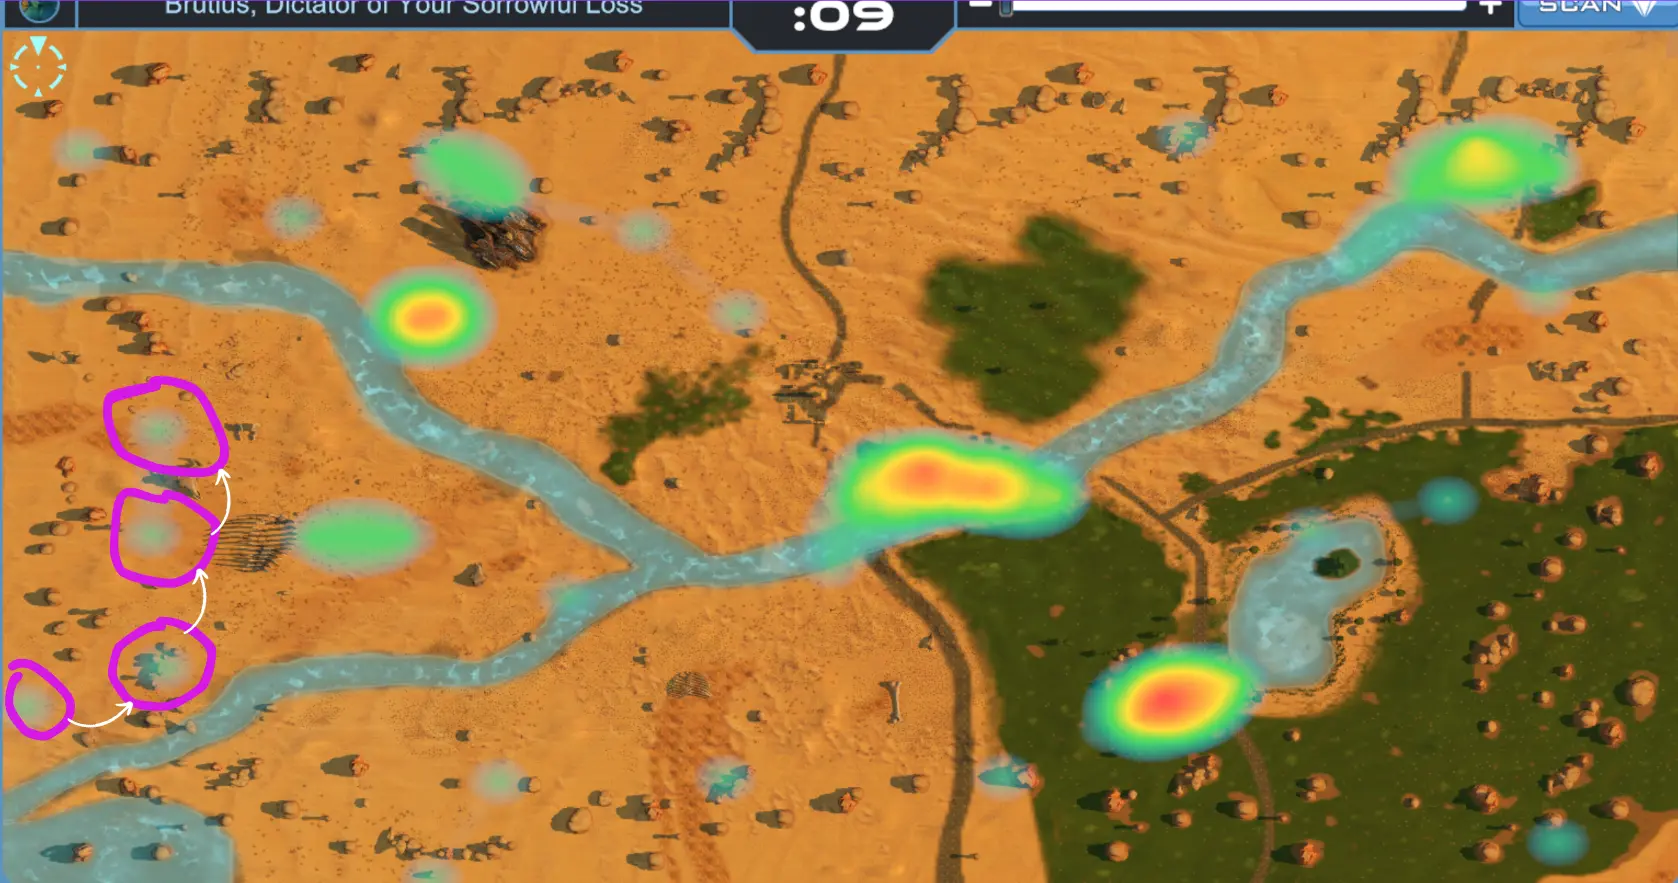
I can start at one end of this little island chain, collecting one after the other over subsequent turns while powering up whatever tickles my fancy, in preparation for later game fisticuffs. It also keeps my health high, so that if a survivor shoots off in my direction, I can be opportunistic and switch tactics for a quick KO, or be ready much later in the piece when the remainders are war-weary and low on their own health.
“But Space Cowboy, you nitwit!”, I may hear you say, “That is merely 4 shards! How does one turn so few into the bounty of riches that is a 20+ Shardmaster victory?”
And I say, that’s quite a rude but fair question. But I do have a plan for at least the next stage. Yes, I will run out of shards with this strategy alone. HOWEVER, thanks to your magical shrinking playzone, a new factor influences what happens next.
Shard re-distribution.
As the ring shrinks, shards outside the border get cut and pasted inside the play area, at random, so looking at the same map, big chunks of shards near the border end up EVERYWHERE!
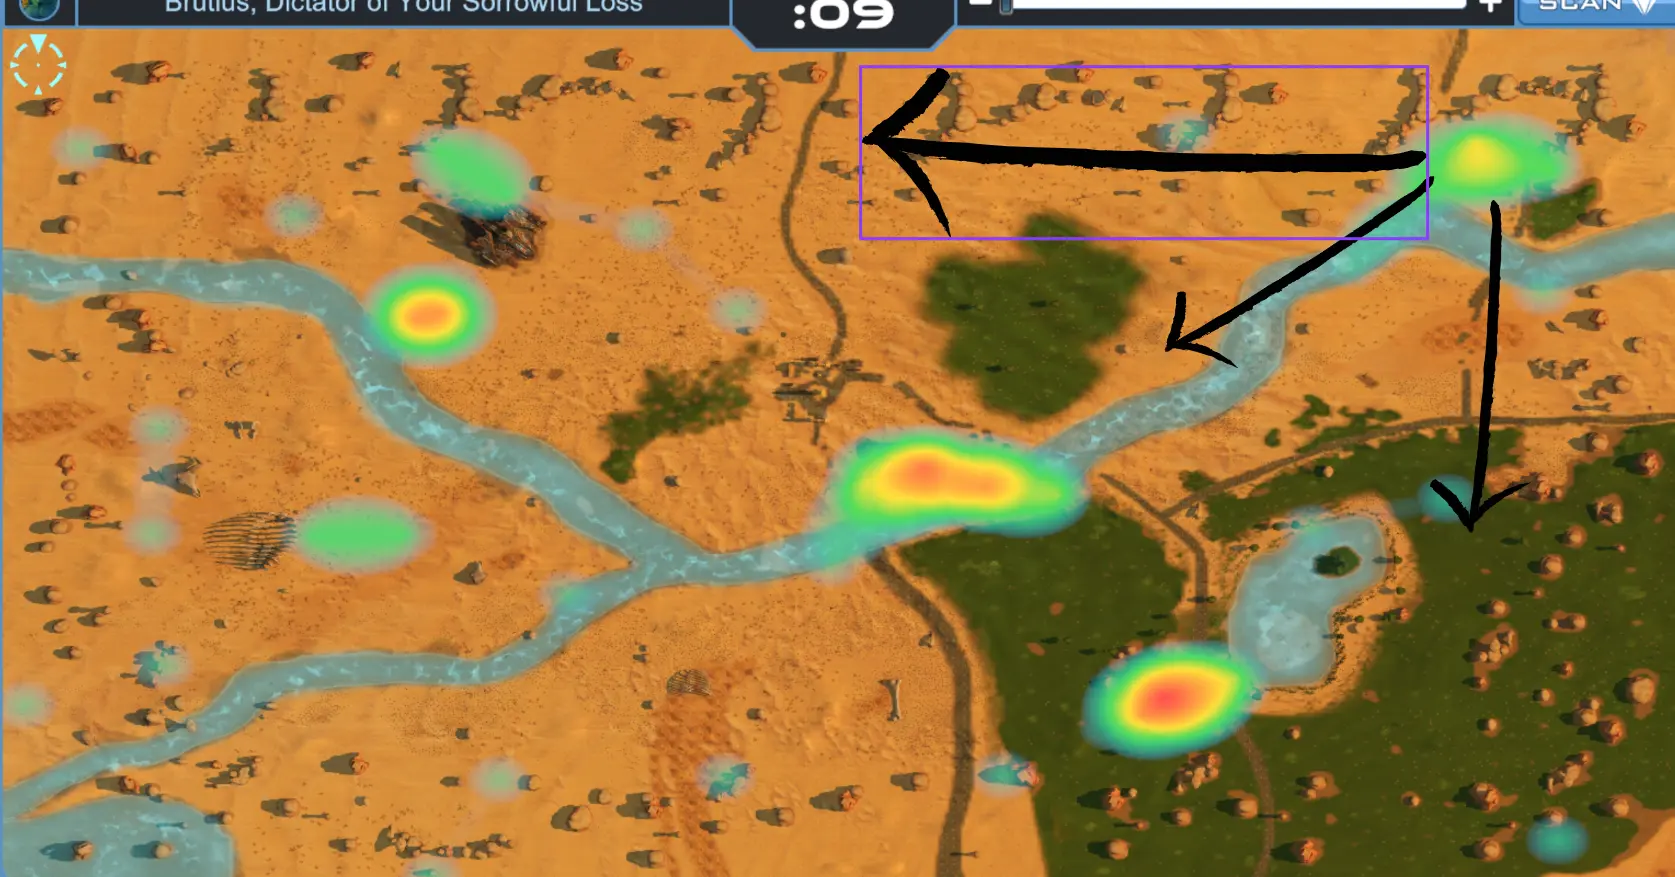
So once I’ve finished with my 4 lonely island shards, there is a much better than even chance that with the combination of between-round-shard-spawns and shard re-distribution due to the ring shrinking, I now have a bucket load of shards within reach of the end of my little 4-shard journey.
Now the final thing I’ll say is that while this can net you a bunch of shards and have you competitive for Shardmaster, this is not a “playbook on how to win shardmaster”. This is very specifically a “playbook on how to keep your health high while you build your skill levels”. This differs from the “always survive turn 1” strategy in that collecting very specific shards paths keeps you where you want to be. Survive is quite random and heavily influenced by other agents. Following a shard path keeps you local, and keeps your agent from roaming.
Thank you for listening to my Ted talk, I’m genuinely delighted to hear everyone’s thoughts!